Photo zines4 min read
How to Make a Photo Zine: From Camera Roll to a Small Story
Choose a theme, edit your photographs, build a readable sequence, and turn separate art pages into a small photo zine you can share or print.
In this article
The short answer
Make a photo zine by choosing one small story, selecting photographs with different jobs, arranging them in a deliberate sequence, and testing the pages together. Make the first version short enough to finish. Art generation can help create individual pages; assembling a booklet and checking its print layout are separate steps.
Give the project a boundary
A camera roll records everything; a zine makes a selection. Start with a sentence such as 'the walk home after the rain' or 'three mornings at my grandmother's kitchen table.' A place, a time window, and something you noticed give you a usable boundary. 'My favorite photographs' usually leaves too many decisions open.
Barnard Zine Library describes zines within a tradition of DIY self-publication. You can carry that spirit into a photo project by keeping your own observations visible. A modest page with a specific memory often says more than an elaborate page with a generic travel slogan.
Choose photographs by their job in the story
Try a six-image exercise: arrival, surroundings, person, detail, pause, departure. These are editing roles, not a compulsory formula. If your best story has only four photographs, give those four enough space.
- Collect a small shortlist before choosing a style. Keep the original files and work from copies.
- Choose an opening scene that establishes where you are. Add an action or encounter, then a close detail that rewards attention.
- Pick an ending with a different pace: an empty room, a departing figure, or an object left behind.
- Remove near duplicates. If two photographs communicate the same thing, keep the one that reads more clearly at a small size.
Make a sequence before decorating it
Put small previews in a row. Alternate distance and density: a wide scene after a close portrait, or a quiet page after a busy one. Look at each adjacent pair. A repeated blue sleeve or curved path can connect two photographs more subtly than matching their subject matter.
Read the sequence once without captions. Then add only the information the images cannot supply: a date, a place, or a remembered sentence. If removing a page leaves the story clearer, remove it. Save that photograph for another project.
Use one art direction as a starting point
ZineSketch is our photo-art tool. Choose a style, then upload up to nine photographs, subject to your remaining credits. Each photograph produces a separate art page. A shared direction can give the set a common vocabulary, but you still need to check differences in palette, subject scale, and detail; consistency is not guaranteed.
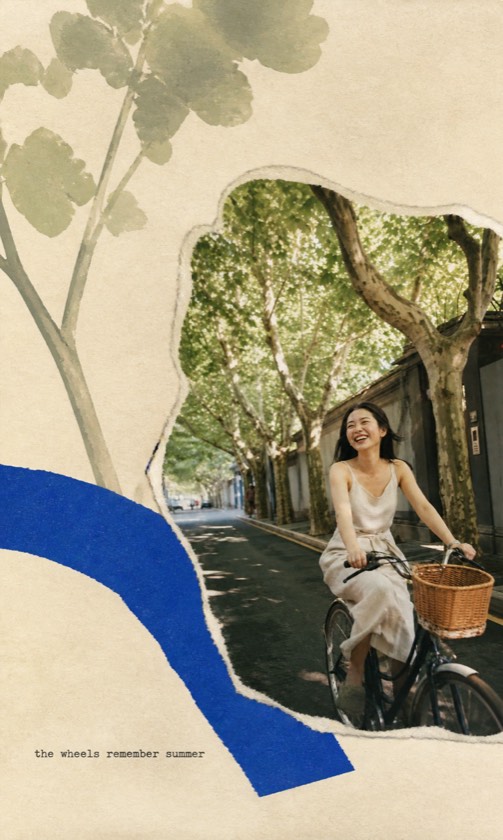
For a photo-led collage, start with Scenes Gathered. Keep the optional direction specific and short; the field allows 60 characters. This example leaves room for the chosen style to do its work:
A prompt to adapt
Quiet afternoon; keep the person small in the scene.
Fix the page that interrupts the story
- Too busy: remove decorative text or choose a source with a clearer main subject.
- All pages feel alike: change the photographic distance, rather than introducing another unrelated style.
- A person or object changed: compare with the source and reject the result if the change matters. Generative art is not exact editing.
- The ending feels abrupt: test a quieter photograph or a short final caption before adding more pages.
Finish a small physical or digital edition
Sign in to download your generated originals and keep a local copy; generated originals are stored for 90 days. Arrange the pages in a layout tool or make a paper mockup. ZineSketch does not automatically bind them into a booklet PDF or provide an editable page layout.
For a folded booklet, confirm page count, trim size, margins, and page order with your printer. Print one test at the intended size. Check faces, captions, and anything close to the fold before producing more copies.
A few more answers
Frequently asked questions
- How many photos do I need for a first zine?
- Four to eight well-chosen images are a manageable editing exercise. The final page count depends on your layout, cover, blank pages, and binding method.
- Does every page need a caption?
- No. Use captions when they add information or a personal observation. Leaving some pages silent can improve the rhythm.
- Can I make a photo zine entirely on my phone?
- You can select photos and generate art pages in a mobile browser. For a printed booklet, use a layout workflow that lets you verify actual page size and order.
Sources & further reading
A note from the editors
Made by the people behind ZineSketch.
We operate ZineSketch and use AI to help draft and edit these guides. We review the text and linked sources before publication, identify our own gallery examples, and explain where our product fits. These guides are not independent hands-on tests of every service mentioned.
About the ZineSketch Editorial TeamMake something of your own
Give your photos
a place on the page.
Choose an art direction and start with a moment you want to remember.
Choose a direction for your photo zine